Why Do My Website Images Look Blurry or Pixelated?
It can be frustrating when you upload a beautiful image to your website, only to find it looks blurry, pixelated, or simply not as clear as you expected. This is one of the most common image-related issues we encounter, and luckily, it's usually easy to fix!
Let's explore the main reasons your images might not look sharp on your website and how to resolve them.
Reason 1: You're Using a Small Image in a Large Space (The Most Common Cause!)
The Problem: You might have an image file that is physically small (e.g., 300 pixels wide) but you've placed it on your website in an area that requires a much larger image (e.g., a full-width banner that's 1200 pixels wide). When the website tries to stretch that small image to fill a large space, it has to "guess" at the missing pixels, which results in blurriness and pixelation.
Think of it like this: Imagine taking a small photo and trying to blow it up to poster size. It won't look sharp; it will look fuzzy. Websites work the same way.
The Solution:
- Always Upload Images at the Correct (or Larger) Dimensions: Before uploading, make sure your image file is at least as large as (or larger than) the area it will display on your website. For example, if your blog post images display at 800 pixels wide, upload an image that's at least 800 pixels wide.
-
Need help with this? Refer to our guide: How to Optimize and Upload Images for Your WordPress Website
-
Reason 2: You are not changing the image size to "Full Size" when Inserting into WordPress
When you insert an image into a post or page using the Classic Editor or Avada's Fusion Builder, WordPress often defaults to a smaller size (like "Medium" or "Large") to help your page load faster. If you've uploaded a large, high-quality image, but WordPress inserts a smaller version and then stretches it, it will look blurry.
- How to Fix This:
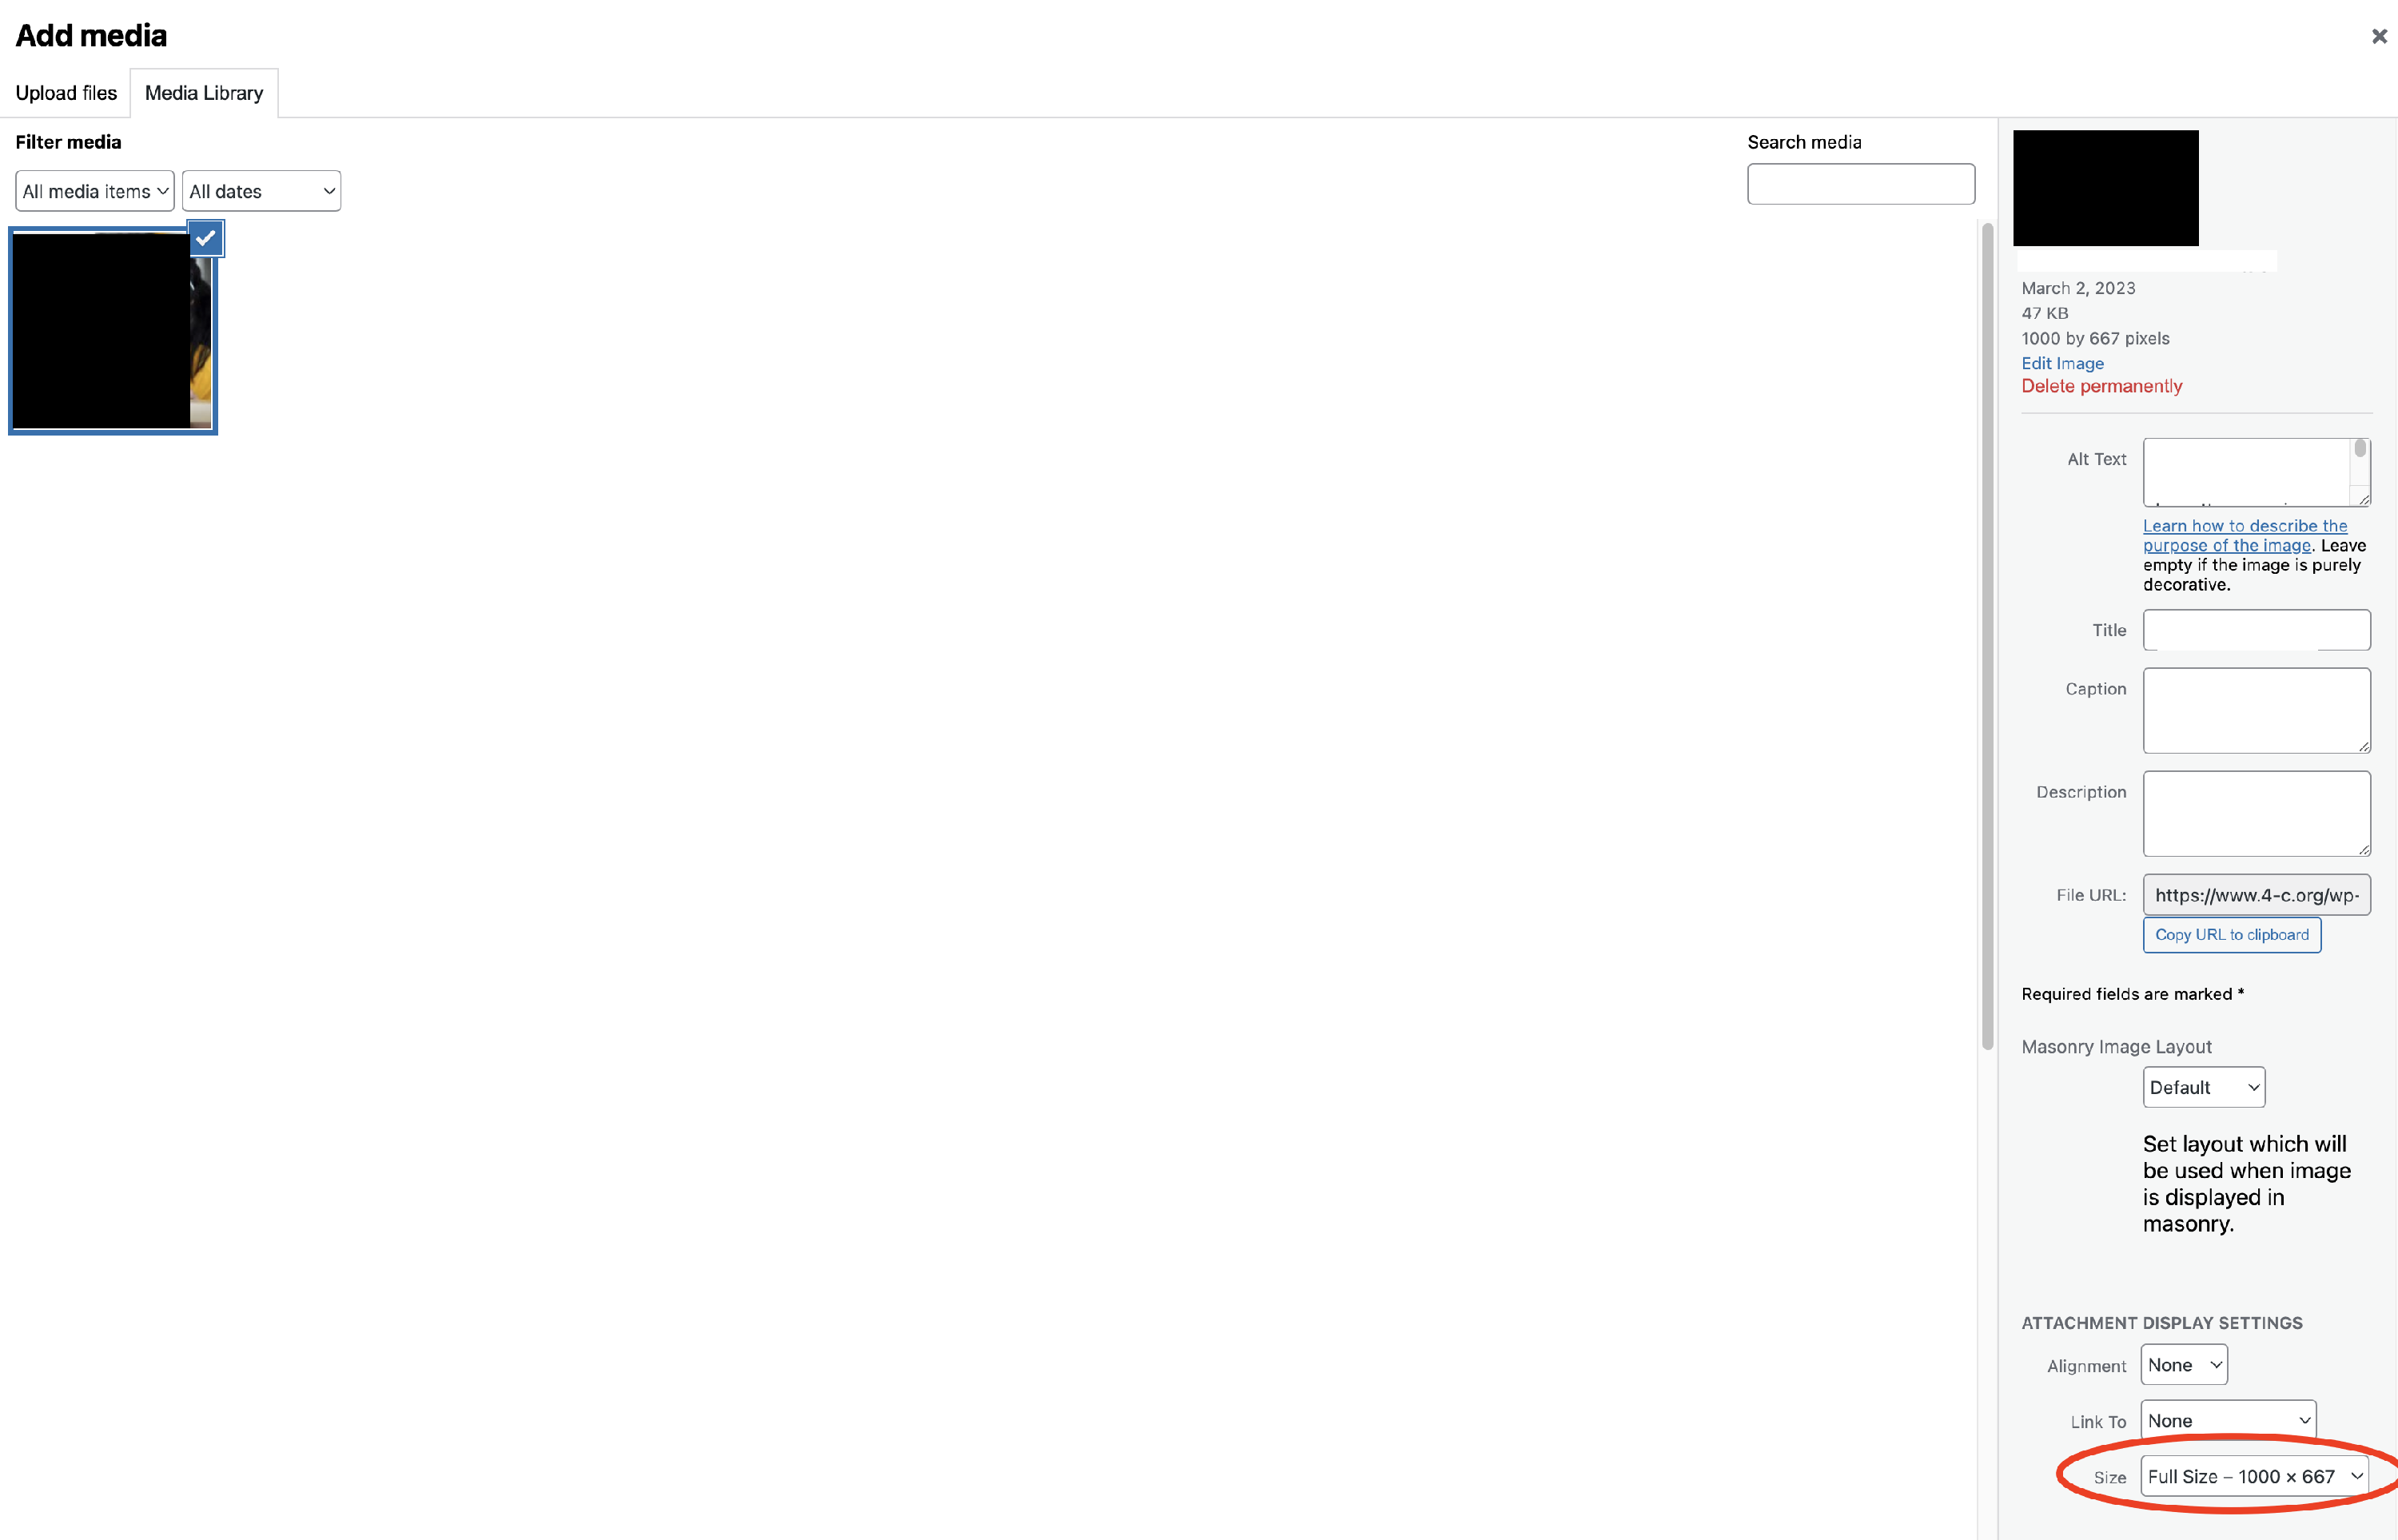
- For the Classic Editor (if you're inserting directly): When you add an image using the "Add Media" button, look for the "Attachment Display Settings" section on the right side of the pop-up window. Under "Size," select "Full Size" before clicking "Insert into post."
- For Avada Fusion Builder (Image Frame Element, etc.): When adding an image through an Avada element (like an "Image Frame" or "Content Box" with an image), ensure you upload the appropriately sized image.
Still Seeing Blurry Images?
If you've tried all the solutions above and your images are still appearing blurry, there might be a more specific issue with your website's theme or a plugin. Please don't hesitate to reach out to our support team at website.support@causeinspiredmedia.com with details about the specific page and image, and we'll be happy to investigate further!